
Board and Batten Headboard Wall Ideas: 4 Balanced Layouts
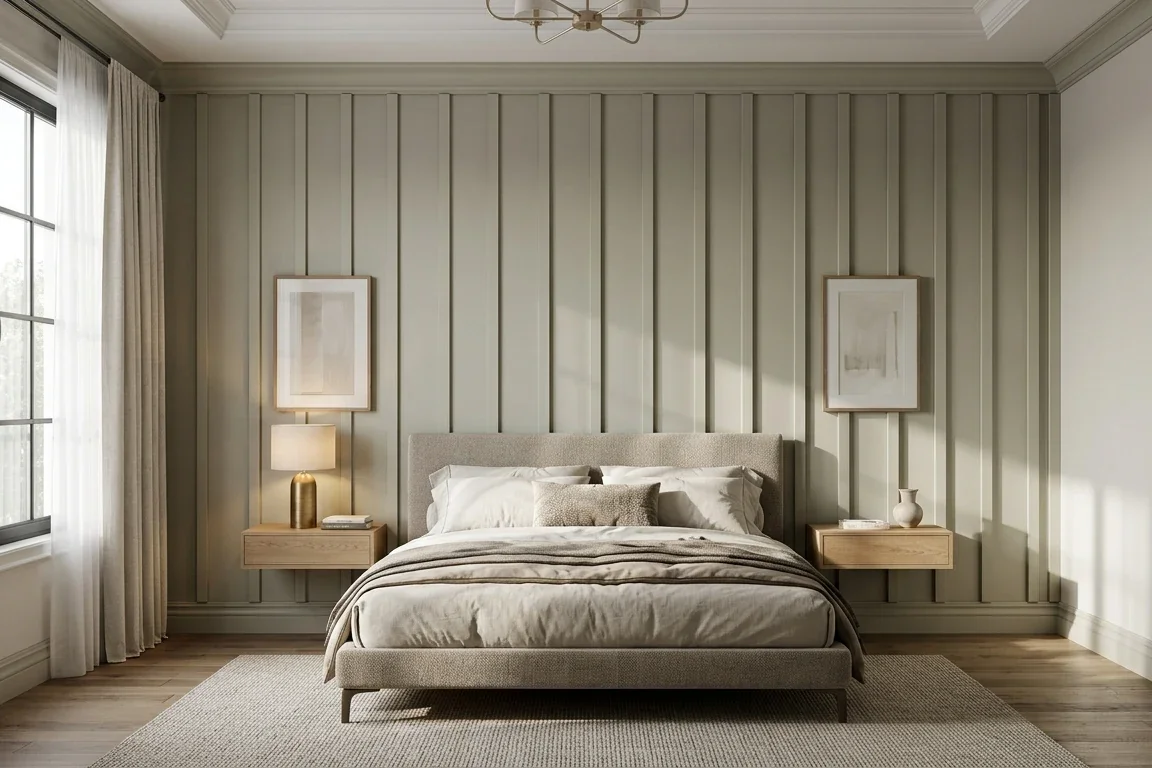
A board and batten headboard wall transforms an ordinary bedroom by giving the bed a structured, architectural focal point without requiring bulky furniture. Instead of attaching a standalone headboard to the frame, running trim boards directly along the drywall creates depth, clean vertical rhythm, and an integrated custom feel.
Choosing Your Headboard Wall Layout
Before cutting trim boards, deciding on your board and batten headboard layout dictates the visual balance of the entire room. Depending on whether you prefer clean vertical lines, symmetrical panels, or framed wall boxes, four layouts stand out for bedroom headboard walls:
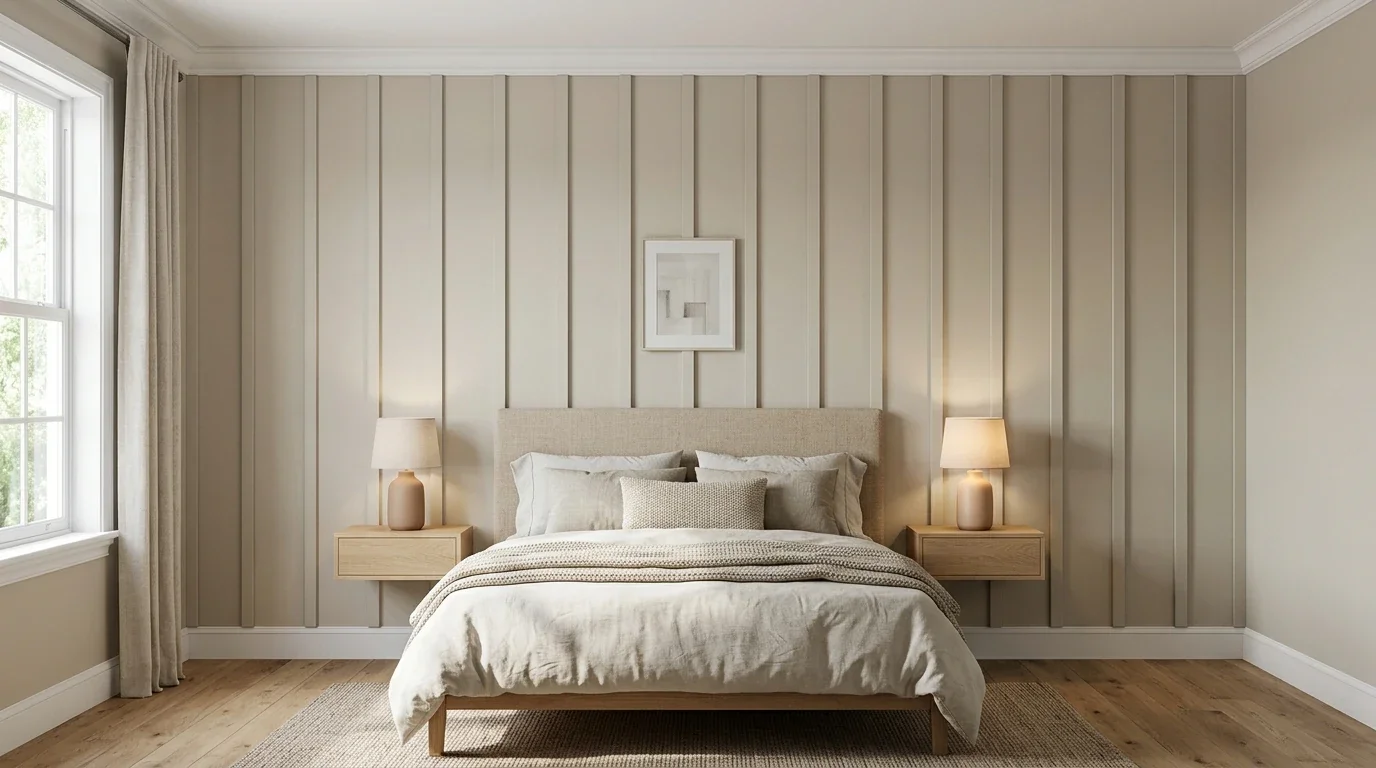
1. Full-Height Evenly Spaced Vertical Battens
Extending vertical battens continuously from the baseboard up to the ceiling draws the eye upward, making standard-height bedrooms feel noticeably taller. The clean vertical repetition acts as a calming geometric backdrop that pairs effortlessly with low-profile platform beds or upholstered linen headboards.
This is the most straightforward, easy board and batten headboard approach because it uses only vertical stiles. Without horizontal cross-rails or intermediate grid intersections to align, installation requires minimal cross-cutting while still delivering maximum visual height.
2. Edge-to-Edge Corners vs. Floating Outer Margins
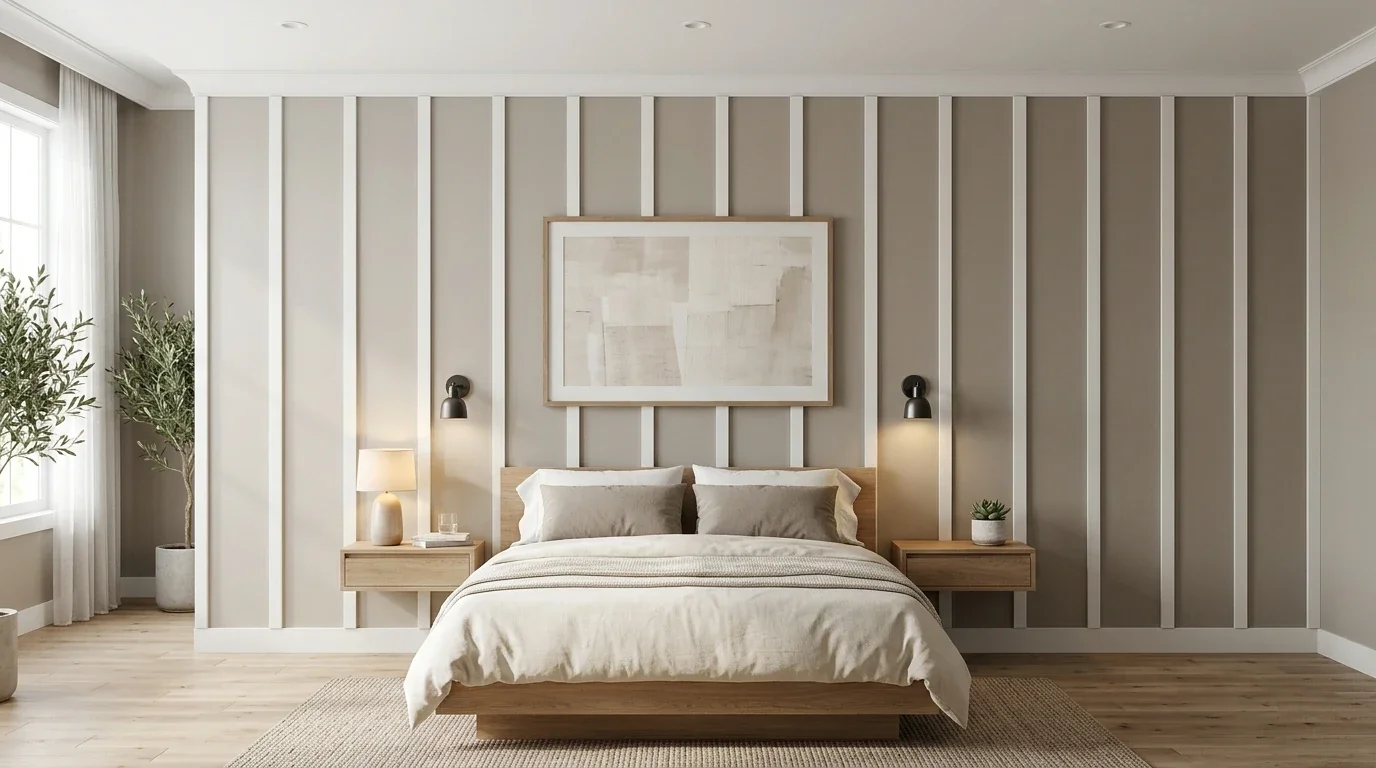
When setting up vertical battens across an accent wall, you must choose how to treat the outer wall edges:
- Edge-to-Edge Layout (Corner Battens): A vertical batten is placed flush against both the left and right corner walls, with all remaining battens spaced evenly across the interior span. This approach frames the wall cleanly between perpendicular walls, creating distinct recessed panels.
- Floating Layout (Equal Outer Margins): Rather than placing battens tight into the corners, the outermost battens are inset from each corner. The outer margins from the wall corners to the first and last battens are calculated to match the interior clear gap between battens. This creates a floating panel effect that feels open and prevents narrow slivers if the corners are out of plumb.
Corner battens work best on straight drywall runs where you want a complete built-in look from corner to corner. Floating outer margins are ideal when you want the millwork to center strictly around the bed or when surrounding trim details make corner joints tricky.
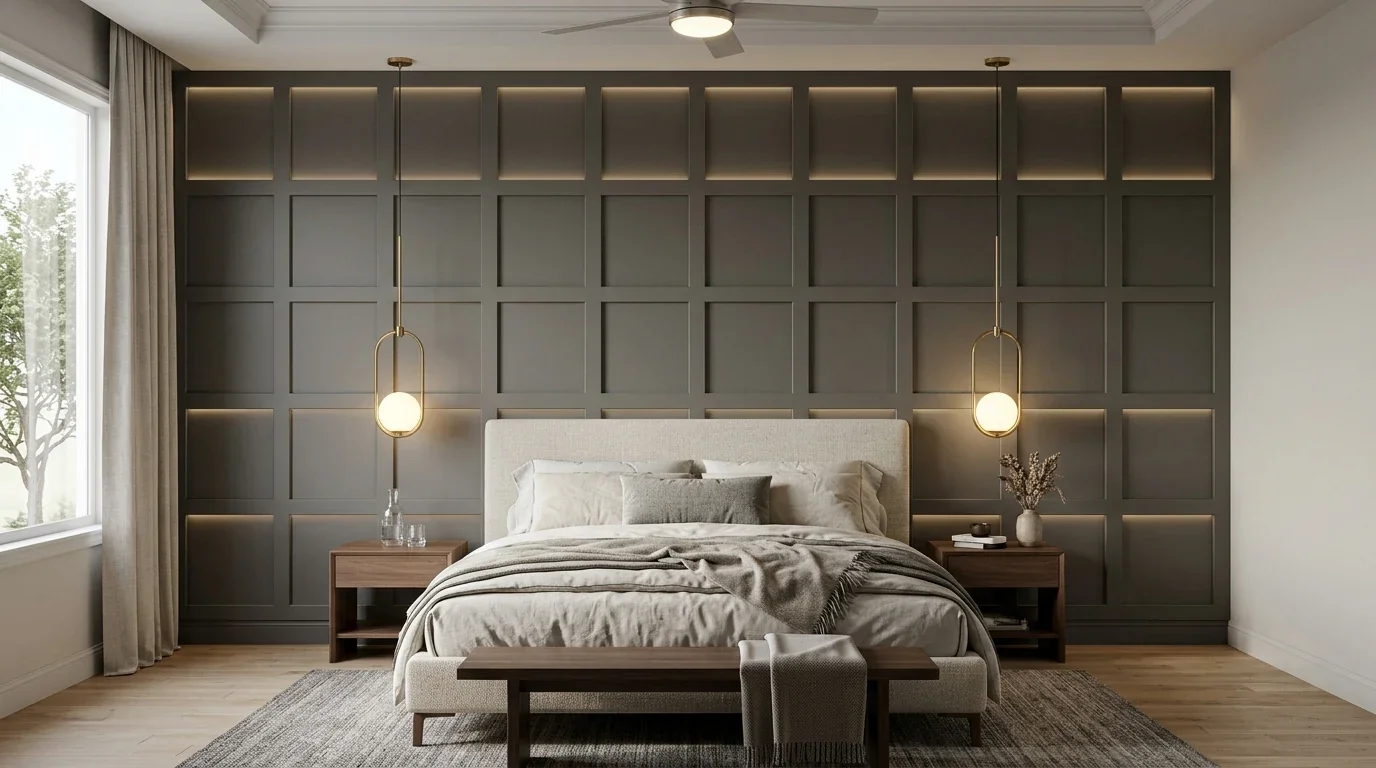
3. Shared-Batten Square Grid Accent Wall
A shared-batten square grid introduces both horizontal rails and vertical stiles, dividing the headboard wall into uniform square panels. This wainscoting-inspired look adds timeless depth and symmetry, framing the bed within a balanced architectural matrix.
Because vertical and horizontal boards share intersecting planes, all battens must maintain identical thicknesses to avoid uneven seams. Planning panel proportions around the height of your headboard ensures that horizontal rails do not awkwardly cut across the top of your pillows or headboard crest.
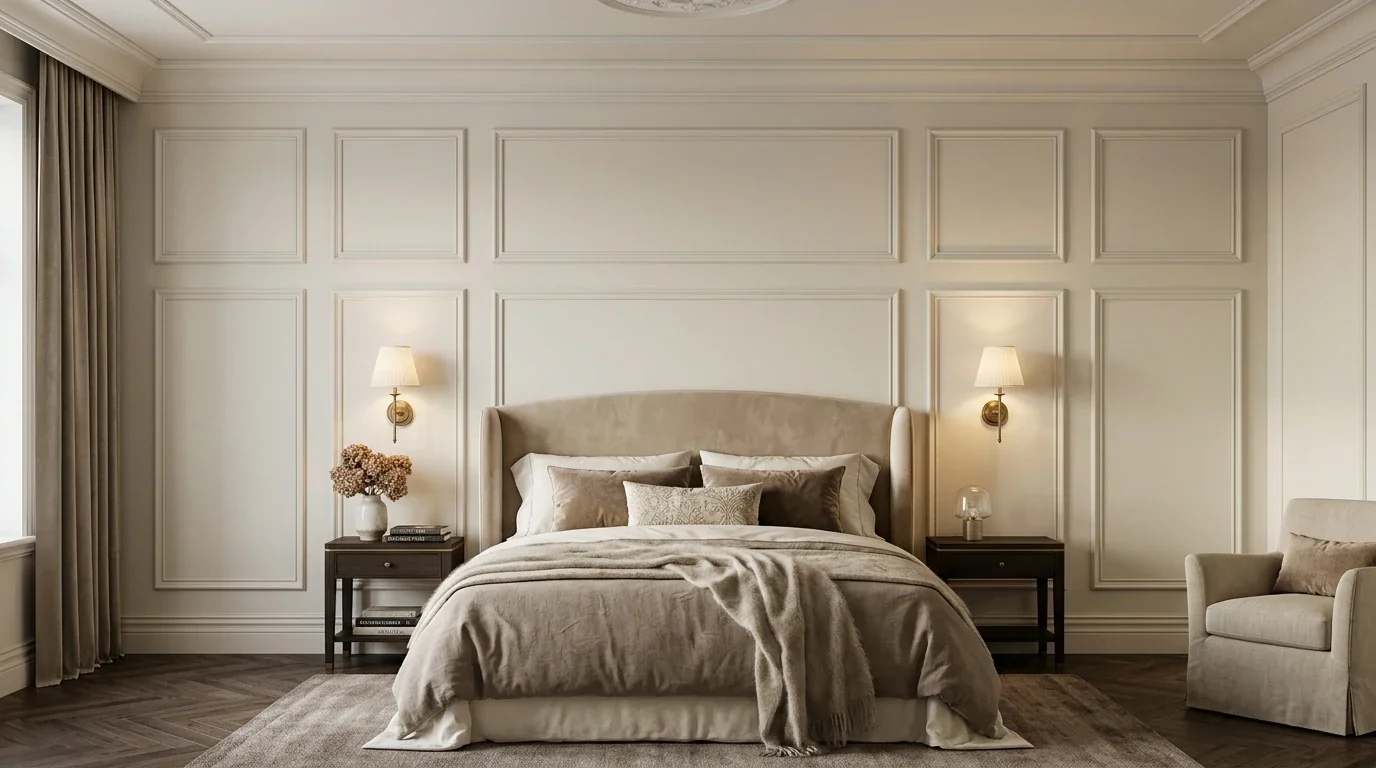
4. Separate Picture Frame Moulding Boxes
Instead of a continuous interconnected grid, separate picture frame boxes use individual moulding rectangles applied with open drywall gaps between each frame. This transitional style softens the geometry of the wall while highlighting wall color inside each framed box.
Separate boxes allow you to customize individual panel widths across the wall—for instance, placing a wider central picture frame directly behind the headboard flanked by narrower symmetrical boxes on each side. This provides tailored flexibility when navigating wall sconces or headboard dimensions.
How to Calculate Batten Spacing on a Headboard Wall
Getting your board and batten headboard spacing right requires simple arithmetic rather than guesswork. To achieve balanced, equal gaps, you subtract the cumulative width of all battens from the total wall span and divide the remaining width by the number of gaps.
Let's look at an exact calculation example on a 3000 mm (3-meter) wide bedroom wall using 6 vertical battens with an actual width of 50 mm each:
- Total Batten Width: 6 battens × 50 mm = 300 mm of trim lumber.
- Remaining Clear Wall Span: 3000 mm - 300 mm = 2700 mm of open wall space.
Now compare how the two outer edge layouts distribute that remaining space:
- Edge-to-Edge Layout (Battens at Ends): Placing one batten flush against each corner leaves 4 interior battens, creating exactly 5 clear gaps across the wall.
- Calculation: 2700 mm ÷ 5 gaps = 540 mm clear spacing between each batten.
- Equal Outer Margin Layout (Floating Battens): Spacing all 6 battens across the wall so that the distance from each corner to the first batten equals the interior gaps creates 7 total gaps (5 interior bays + 2 outer corner margins).
- Calculation: 2700 mm ÷ 7 gaps ≈ 385.7 mm clear spacing between battens and at the wall edges.
Measurement Note: Always measure the actual face width of your trim lumber rather than nominal board sizes before calculating your layout, and differentiate between center-to-center measurements and the clear gap between boards.
Plan Your Wall Layout Online
Before making your first saw cuts, test your dimensions with our interactive planning tools:
- Board and Batten Calculator: Calculate total board feet, material quantities, and trim counts based on your wall size and lumber dimensions.
- Wall Panel Planner: Preview full-height vertical battens, square grids, and picture frame boxes with precise spacing, custom wall dimensions, and door or window clearances.
More ideas for your project
All ideas