

How to Measure an Irregular Garden Bed
Measure your planting area with a sketch and a tape. Choose your shape and follow the marked drawings to find the area you need to cover.
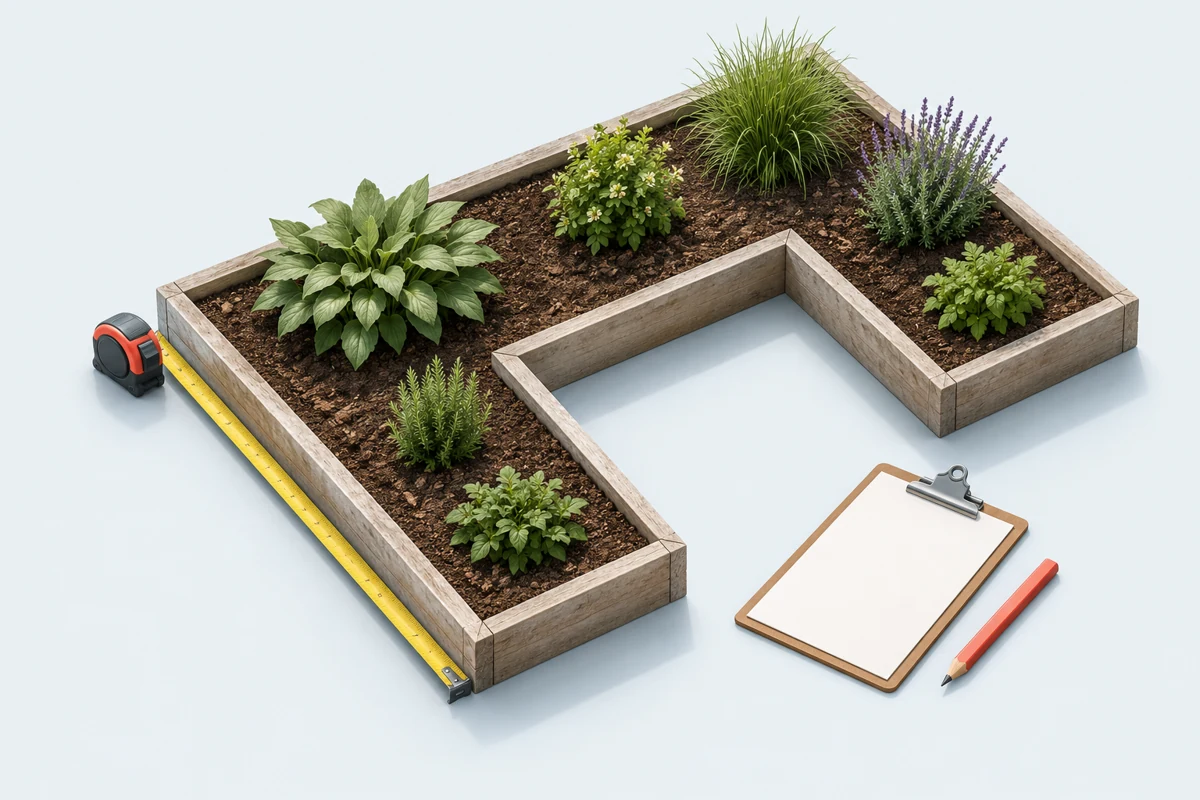
Here is how to measure an irregular garden bed without counting the same ground twice: split straight-sided beds into rectangles; measure curved beds in strips. Add those areas, then subtract any ground that will stay uncovered. You need a tape measure, string, a pencil and a rough sketch.
Choose the outline that looks like yours:
- L shape or a missing corner — measure separate rectangles.
- Curved or kidney-shaped outline — measure widths along a straight line.
Mark the ground you will actually cover
Follow the inside of the edging, not the spread of the plants. Mark paths, paving and other areas that will receive no material. Measure at ground level, and keep the tape straight rather than sagging. Use feet throughout or metres throughout; the answer will be in square feet or square metres. For mixed feet and inches, 6 ft 6 in is 6.5 ft, not 6.6 ft.
L-shaped garden bed: add two rectangles
Draw a dividing line from the inside corner to the opposite edge. Each patch of ground should belong to one rectangle only. The example below uses a full bottom arm and the remaining upright.
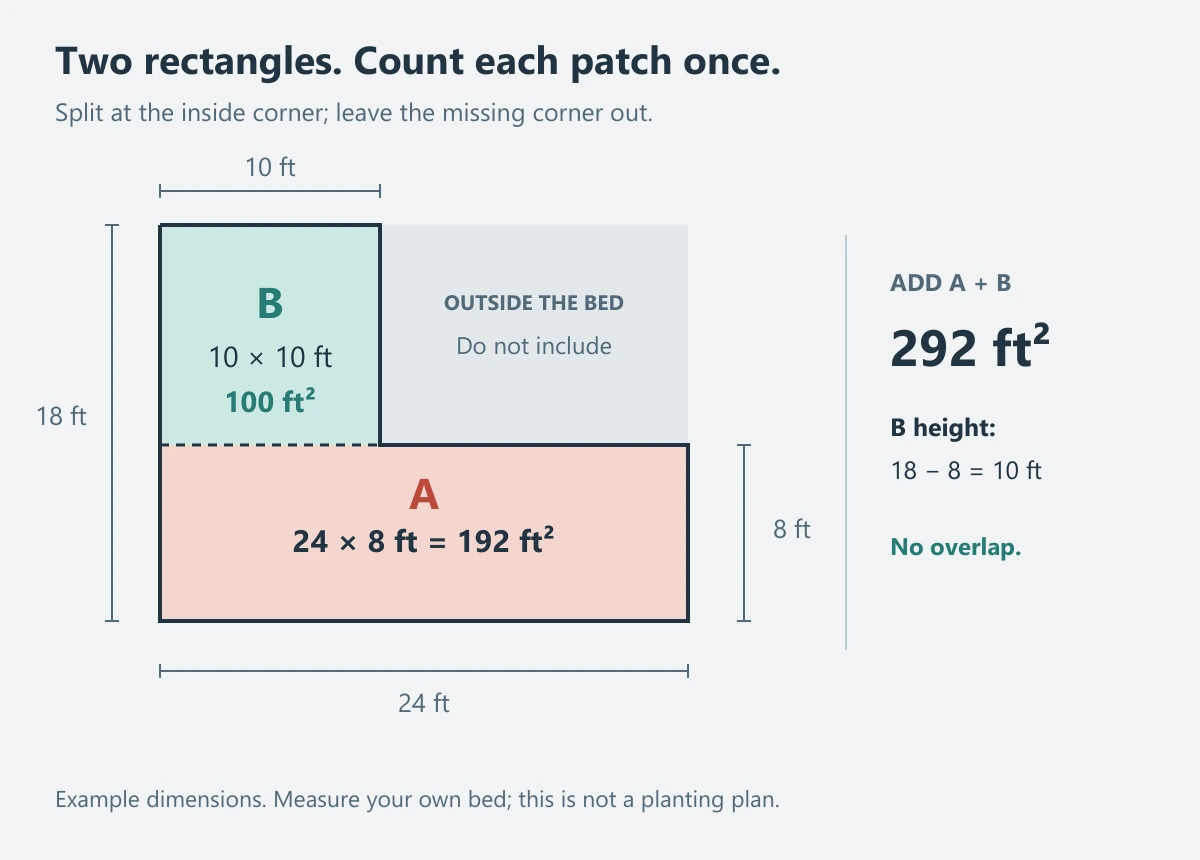
- Measure rectangle A: 24 × 8 = 192 ft².
- Measure rectangle B: its height is 18 − 8 = 10 ft, so 10 × 10 = 100 ft².
- Add them: 192 + 100 = 292 ft².
Why not use 24 × 18? That includes the empty corner. Using both full arms also counts their shared corner twice. The dashed line in the drawing shows where one rectangle stops and the other starts.
Have a 3 × 4 ft paving slab inside the measured bed? Subtract its 12 ft² once: 292 − 12 = 280 ft² to cover. Do not subtract the missing corner again; neither A nor B included it.
Curved garden bed: measure one strip at a time
Stretch a straight tape or string beside the bed. Mark positions along this baseline, then measure the bed's width at a right angle at each position. If the baseline is outside the bed, measure to both edges and subtract the near distance from the far distance.
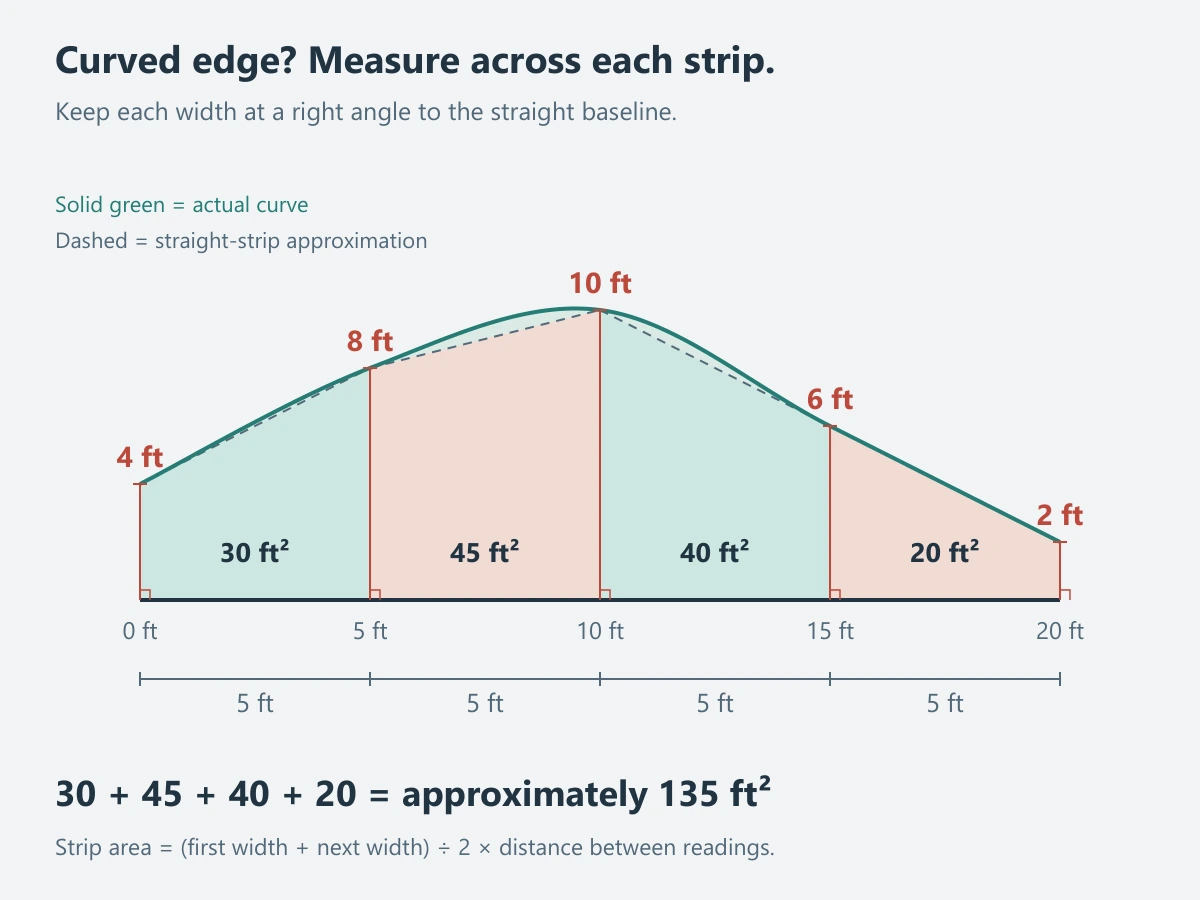
For each strip, average its two end widths and multiply by the distance between them. The first strip above is (4 + 8) ÷ 2 × 5 = 30 ft².
| Strip | End widths | Area |
|---|---|---|
| 1 | 4 and 8 ft | 30 ft² |
| 2 | 8 and 10 ft | 45 ft² |
| 3 | 10 and 6 ft | 40 ft² |
| 4 | 6 and 2 ft | 20 ft² |
| Total | 20 ft baseline | ≈ 135 ft² |
This is an approximation: the strips replace small curves with straight edges. Take closer readings near a bend or bulge. Five-foot spacing is an example, not a rule. Include both ends; a width is zero only where the bed actually comes to a point. For unequal spacing, use each strip's own length.
Put your garden bed area to work
Write down the total after subtracting uncovered ground. Keep depth and any ordering allowance separate. For the L-shaped example without the slab, enter 292 ft² under Known area in the mulch calculator, then enter the depth of the new layer. Do not also enter rectangles A and B.
Record separate sections if they need different depths. These methods estimate a flat footprint; a steep slope or variable-depth fill needs additional measurements.
Measurement sources
The drawings and worked numbers are original examples. University of Maryland Extension explains dividing irregular areas into regular shapes. Mississippi State University Extension describes measuring curved boundaries from a straight baseline.